Quantcast
Channel: Core77
Viewing all 19151 articles
Browse latest View live

Design Job: Live VIVID! French Bull is Seeking a Senior Designer in New York, NY

$
0
0

Pattern and Graphic Designer for French Bull Overview: French Bull, a NYC based company has a passion for pattern, and transforming products from ordinary to extraordinary. The Designer will work directly with the founder to initiate concepts each season reflective of French Bull's creative

View the full design job here

Using Spinach Leaves To Regrow Hearts

$
0
0

Biomimicry and bioengineering have lost some of their buzzword luster in design circles, but the IRL applications are still going strong. To continue fighting the shortage of viable organ donations, researchers around the world are experimenting with lab grown options. But some tissues and muscles are harder to synthesize than others. Organs like the heart rely on a dense and extremely tiny network of blood vessels and capillaries to fuel the cells and control muscular contractions. Hearts really don't work well without blood and oxygen, and after heart attacks or other ailments the original cells are often too atrophied to do the job themselves. Science has pushed tissue production into wild new areas, but fabricating a delicate vessel system is still excruciatingly difficult. So why build one, if you can grow one more easily?

Researchers at Worcester Polytechnic Institute have successfully taken spinach leaves from leafy green to starter scaffold for heart tissue in a matter of days. After much reflection on the veiny needs of the human heart, the researchers' familiar lunch leaves started to look a lot more intriguing. From the aorta-like stem to the miniature veining, leaves share a lot in common with our own bodies. As they put it in their report, "Plants and animals exploit fundamentally different approaches to transporting fluids, chemicals, and macromolecules, yet there are surprising similarities in their vascular network structures."

Harnessing the durable cellulose framework of common household spinach, the team carefully decellularized leaves with detergent over the course of a week. Stripping away the greenery, they were left with an intact vascular network and supporting tissue. By stacking and integrating layers of this spinach scaffold, they hope to create more dense and powerful cardiac tissue. 

While 3D printing tissue and other cell growth technologies advance alongside, creative repurposing of common organic frameworks stays salient. It's a heartening reminder to keep eyes peeled for answers all around us.

A Two-Story Treetop Sauna

$
0
0

In southwestern Germany, the Schwarzwaldhotel Tanne resort has a rather unusual sauna on-site. At first it doesn't appear to be anything more than a timber-frame cabin…

…until you get a higher angle and see that there's no foundation.

The entire two-story structure is supported by a gigantic tree...

...and stands ten meters above the valley floor.

Some of the branches wind right into the structure and re-emerge from the roof.

The main floor consists of an outdoor deck and an indoor sauna that can seat 30.

Upstairs is a bedroom for rent.

I'm dying to know how this thing was constructed and is anchored. While I was able to track down the builder, Baierbronn-based carpentry firm Zimmerei Schleh, the sauna's project page is frustratingly light on details. And despite the structure having been erected in 2010, the accompanying photos are absurdly low-res:

I was impressed to read, however, that they built it right through a snowy winter.

For those of you within range of Germany, details for visiting the spa and sauna are here.

Calico Wallpaper's Collaborative, Process-Driven Collection at Salone Del Mobile

$
0
0

Calico Wallpaper has collaborated with four talented designers/design teams for their first solo Milan Design Week exhibit, Imagined Landscape. Faye Toogood, Snarkitecture, Ana Kraš and BCXSY are the first outside designers to collaborate with the bespoke wallpaper company. For the collection, they explored the relationship between sense of place and imagination to dream up beautifully intricate 2D wallpaper designs based on 3D processes.

BCXSY experimented with bubbles to create their fun, scientific inspired wallpaper design entitled Microcosmos. The random, enlarged bubbles are meant to appear as though you're peering through a microscope. Once the bubbles were physically printed, designers Boaz Cohen and Sayaka Yamamoto digitally combined and colored them.

BCXSY's design process is equally as beautiful as the end result of their experimentation, which is displayed covering objects and walls of various shapes and sizes. The design duo's careful design process is reflected in the airy, seemingly random shapes and the delicate color palette they decided upon.

Faye Toogood's more literal take on the theme entitled Woodlands, Fields, Moors draws inspiration from 17th century Rococo and her childhood landscape growing up in England. The original paintings were translated into wallpaper that is able transform any room to a different place because the design is able to sprawl across multiple walls at once.

The final result still looks 3D!

Snarkitecture's design for Topographies stemmed from the design group's fascination with excavation. The design process behind the minimal, yet detailed design involved designers Daniel Arsham, Alex Mustonen, and Ben Porto tearing thick white paper to create a sense of architectural depth. The 3D exercise was then scanned and turned into 2D wallpaper. Even the final 2D scan of the 3D design gives the illusion of dimension, referencing wallpaper's natural aging process in a beautiful way.

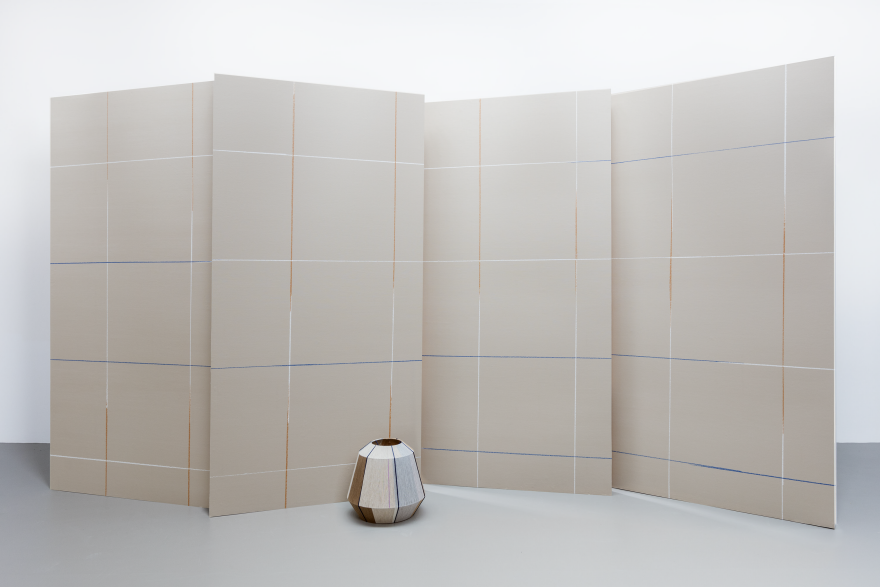
Ana Kraš took an even more minimal approach when creating her Mira & Miloš wallpaper pattern. The hand-drawn lines across the page reflect a sense of structure, but when you look closely, you notice contained chaos created by shifts in color mid-line.

Imagined Landscape is on view at Salone del Mobile until April 9 at Via Varese 12,
Brera Design District in Milan, Italy.

Reader Submitted: Breathable Garden Pots Made from Fabric

$
0
0

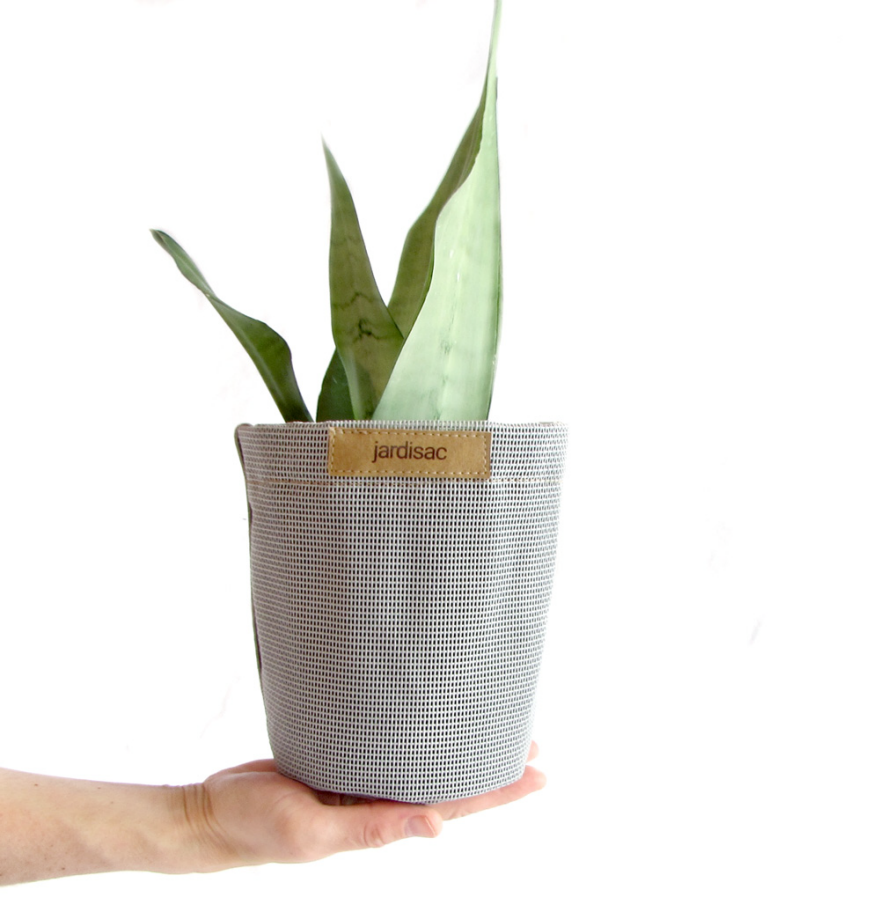
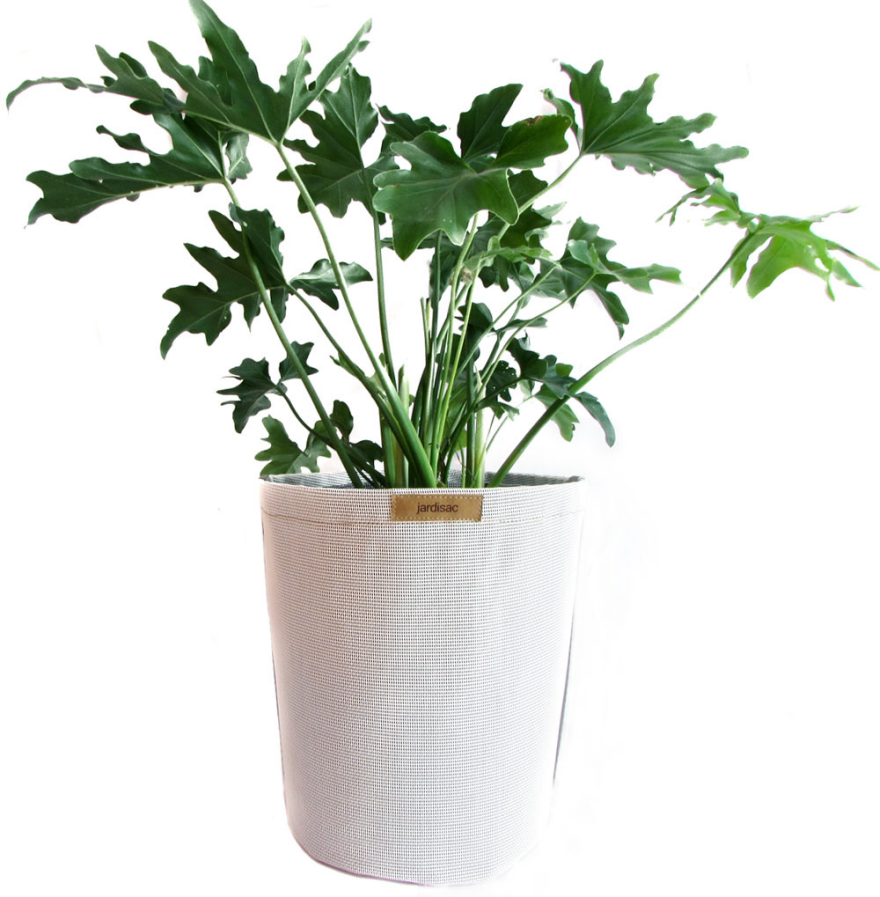
Last summer, I noticed that the plastic pots I had purchased at the beginning of the season were all broken because I had forgotten to protect them for the winter. I wanted to find a solution and design an outdoor pot that would be able to spend the summer and winter outside with minimum maintenance.My background is in graphic design and fashion design, so I decided to create a durable and permeable pot made from sturdy fabric.


View the full project here

How to Get a Grasp on Form Development

$
0
0

Sketching 101 is the bread and butter of any ID education program. Learning how to create lifelike shading and proper call-outs are tips that any design student will remember, but what if you're a student struggling with something a bit more fundamental i.e. coming up with interesting forms that veer from the elementary? Core77 discussion board contributor Gazoo outlines their form-related concerns in a recent board post: 

"This has always been my weak point in my portfolio and I know it's currently hurting my chances at finding a new gig. I've pretty much got everything else checked off the list from the feedback I get from employers: good research, diverse set of ideas, informed decision-making, CAD execution etc.... That's not to say my forms are bad, but there's just not the creative surfacing that some directors look for.

My sketch technique is good, whether it's digital or marker, but the forms just don't come to me easily. I draw shit for at least the first 2-3 hours and then my forms slowly become more 'mediocre'. I know practice makes perfect, but at some point, I feel like I'm just getting good at drawing bad forms. I reference Pinterest for inspiration but that only gets me so far. Has anyone else had success stories in improving this skill set? What are some specific strategies in exploring form that helps you?"

Luckily for Gazoo, a number of experienced designers with years of sketching and ideation experience were around to help steer our reader through this difficult dilemma. 

For the sake of easy reading, we've compiled all the best tips in list form for those of you struggling with the same problem:

Look at what's around you

"One thing that can help better understand form is to practice a lot of just deconstructing existing things. Sketch cars, people, objects and spend time really understanding how the forms get created on paper...Looking at a car, breaking down a single panel and thinking "what is the surface, how would I draw it, how might I CAD it, and how would I manipulate it?" Sometimes just trying to reconstruct an existing object in sketch and 3D helps you appreciate what went into building a shape, and that shape now becomes part of your form vocabulary you can use." -Cyberdemon

"Start building a library of forms (pinterest boards). Maybe re-sketch or trace sketches or products you like and see how they treat the forms and how they come together. Most people with your problem think of primitive shapes first....how to tweak a square, rectangle, sphere. Maybe start with abstract shapes instead."- FH13

Learn with your hands

"I would also not give up on practicing with good old fashioned clay or foam. Building a form with your hands is the purest way of appreciating the sculptural qualities of something. - Cyberdemon

Open sketches up to new possibilities 

"I think you are a bit fixed in your mind when doing explorations. A lot of form design starts with a free mental visualization and your ability to manipulate form in your mind. Picture a sphere or ellipsoid in your mind and start to sculpt it. Experienced designers do this in fractions of seconds and know how to get it to paper. On paper, you can simply start freely drawing lines. Colani always advised to start with freely drawing curves and then evolving them towards 3D forms, eventually making them realizable. I also advise to work with river clay if you are beginning at form development, it greatly stimulates the brain and your creative flow." - ralphzoontjens

Start loose, zero in later

"You may be thinking too linear if your forms are based on features and existing geometry...Instead of thinking of outlines think of main form characteristics. Maybe a character line or one main detail that drives the overall look. Maybe sketch out with markers very loosely so that you are not confined to the "outline" of the product." - FH13 

Be open to criticism

"One thing that might be useful is to post a critique of your own work. Being self critical helps you look for opportunities on where to improve" - Cyberdemon

Or simply give in to the fact that nothing is original..

"I steal. I see a form I like, I take it. Always have, always will...What I don't do is copy." - iab

____________________

What are your tips for good form development? Share your comments in the thread below or within the original Core77 discussion board!

(banner image source: Adityaraj Dev's Coroflot portfolio)

Hand Tool School #26: More Furniture in a Hurry

$
0
0

(Folks, please note that I wrote this back when I still used power tools and prior to mastering hand-cut dovetails.)

My sister-in-law is moving into a new house after completing her PhD. Essentially she is starting from scratch and has no furniture. Fortunately she has a brother-in-law looking for an excuse to make something. With some urging from my wife and mother-in-law, I started on a quick project this weekend to give her some semblance of furniture. She loves to read, and I thought that no bedroom would be complete without a bedside table to put your book and the dreaded alarm clock on. Her tastes are simple with a hint of Asian.

Since Shaker and Asian design have so many parallels I thought I would blend them with a Shaker side table inspired by the Sabbathday Shaker community in Gray, Maine. My wife's family has been vacationing in Maine for years and they even visited this community one year so it is even more appropriate. The Asian blend will be mostly the finish and possibly the drawer pull. I will be painting the piece black and putting a few top coats on lacquer on it. I haven't found the drawer pull yet, but I am envisioning a Chrsyanthemum motif. If nothing else I will try my hand at carving one if I can't find a metallic equivalent.

The basic design is taken from a Woodworking magazine article by Chris Schwarz because of the ease of construction and the very little amount of stock required to build it. Since the final product will be painted I was thinking poplar. However all the poplar in my shop is already spoken for and milled. I only need about 12-15 board feet so I turned the to scrap pile of pine to see what I could find.

There was actually more than this floating around the shop too, but this pile would serve my needs and then some. 

One of my favorite parts of a project is laying out the stock and figuring out where the individual pieces will come out of the rough stock. It is not so important here since the finished piece will be painted, but with so many holes and knots and such on this stock it took some planning to work around it. After some milling I got my pieces laid out for the joinery. Not pictured here are the 18 in square top and the drawer bottom, but it is shocking how little wood is needed to build this table.

Check out the awesome bench underneath it all too!

I cut most of the mortise and tenon joinery on the router table this time. I really like how I can perfectly dial in a fit using my router lift. For the bottom rail just below the drawer, I chopped out the mortises using a chisel and sawed the tiny 5/8 in tenons by hand. Finally I tapered the legs using the bandsaw and cleaned up the cut with my jointer plane.

Time for a quick dry fit.

Here you can see the top rail merely fit into place. I cut 1/16 in shoulders on 3 sides of the rail on the router table and now I needed to dovetail it into the tops of the legs. My dovetailing is still very weak, and I keep using my bench in progress as an excuse for not practicing. No excuses for this, so I went to work cutting the tails first. This went well since they are so small and only a single tail on each end of the rail. I scribed the outline of the tails into the top of the leg and went to work with my chisel. Both joints fits snugly and strongly but one had a little more slop around the top edges. The other joint came out really snug. I took pictures and loaded them onto my external hard drive only to have it crash so I have no proof.

I beveled the bottom of the top board by marking a line 2 inches in on all four edges and then planed the bevel using my jack plane. From here, I glued everything up and finished the assembly.

I took the measurements for the drawer and built a simple rabbetted drawer. (I told you my dovetailing is weak!). For reinforcement and a little style, I pegged the rabbet using walnut Miller dowells. I really like the look this gives to the piece and I had some left over from my last sushi box.

I used a block plane to finesse the fit. I did get some tearout at the swirly grain near the front edge so rather than temp fate, I went to the RO sander. This turned out to give me a great finish, but my lack of attention accidentally rounded the corner a little leaving me with a sloppy reveal. Since the drawer ended up being a little proud of the front, so I planed about 1/32 off the front and that killed a little of the bad reveal. Ultimately the black paint will disguise this reveal too so I wasn't too worried. I'll chock this one up to experience and be more careful next time.

Finally, I sprayed on a good quality black enamel paint. 2 coats gave me great coverage. After this was dry, I sprayed on several coats of lacquer until I was happy with the shine. I did apply a coat of Renaissance wax to the top to give it a slick feel.

In the end, I chose an antique knob I found at a flea market that had the Chrysanthemum motif I was looking for. The blue color really popped against the black finish too.

This was a fun project that came together really fast. My sister-in-law is really happy with it, and was really happy with the drawer joinery as well, so I didn't have to feel bad about chickening out on the half blind dovetails.

Hey, if nothing else, this table beats the cardboard box she was using as a night table!

Leonardo da Vinci's Ingenious Design for a Self-Supporting Bridge

$
0
0

Of the many structures Leonardo da Vinci designed, perhaps none made more ingenious use of materials than his practical design for an easy-to-assemble, self-supporting bridge. 

Here's a father and son demonstrating its construction in their backyard, without using a single tool:

As you can see they've used no fasteners, since the structure is designed to support itself. But in da Vinci's original design, notches were meant to be cut into the timbers to add greater security to the structure.

The design is not limited to just the five crossmembers depicted above. Here's one with nine crossmembers, erected as decoration in the German city of Freiburg.

And as an example of this design in practical use, here's da Vinci's design serving as the support structure for this footbridge in Morsø in northern Denmark.

You might be wondering how strong the design is. Well, here's a version erected out of construction lumber in Stuttgart, Germany, with the city's Mayor being driven across it:

That was at an event last year celebrating traditional carpentry. (The folks you see wearing black hats and vests have donned traditional German builders' garb.) Incredibly, the 10-meter-span structure was assembled by eight apprentices and two masters in about ten minutes! Here's how they did it:


Mid Century Modern Find of the Week: 1950s V-Leg Vanity

$
0
0

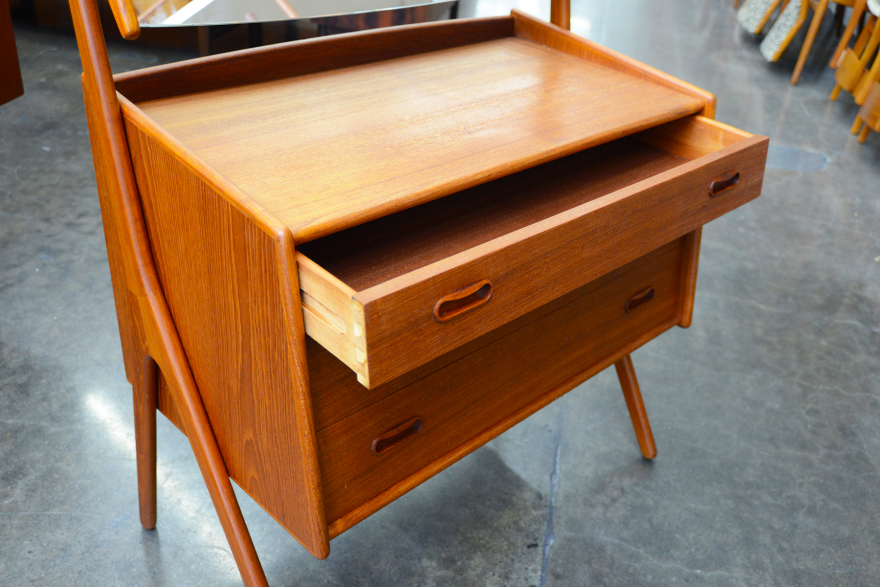
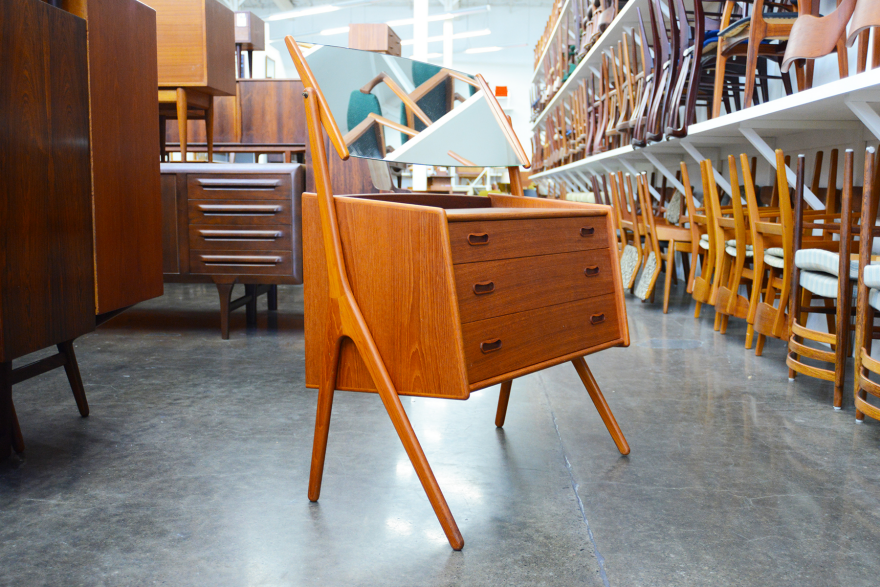
This beautiful mid century modern vanity hails from Denmark, and was crafted sometime in the late 1950s.

Nothing is known about its designer or manufacturer, as it's unmarked, but the build quality is exceptional, and that is reflected in the exposed joinery on the legs and throughout the case.

An articulating mirror is accented by a solid teak frame, and complimented by three lower dovetailed drawers for additional storage.

We often find vanities like this piece around Denmark, but this one in particular seems to be a true survivor, sporting its original mirror, and has nearly no wear after almost 60 years of everyday use.

Piece: Unknown
Designer: Unknown
Year of Manufacture: Late 1950s
Price: $2,250
Dimensions: 32" wide x 19" deep x 27.5" tall (floor to table surface)/ 43.5" tall (floor to top of mirror)
_____________________________________
Core77 readers get 15% off of any purchase at Mid Century Mobler. Enter promo code MCMCORE77 at checkout.

Design Job: Content is King! Industry Dive is Seeking a Graphic Designer in Washington, DC

$
0
0

Your next opportunity awaits: • We are looking for a Graphic Designer to join Industry Dive's innovative design team. Our team is highly collaborative, cross-functional, and always puts the user – client or reader – first. • We also care a lot about team growth. Each week, we

View the full design job here

Excerpts from frog's "Ask Me Anything" Session on Reddit

$
0
0

Industrial designers Inbal Etgar and Francois Nguyen, both Creative Directors for frog, recently participated in a Reddit AMA on frog's behalf. Here are some of the excerpts you up-and-coming designers may be interested to read:

Q: What are the top 5 questions you ask yourself when critiquing or evaluating a concept prior to review with a team?

Etgar & Nguyen: 1. Have I seen this solution/design before? Is this new?

2. Am I solving the problem elegantly?

3. Is this design manufacturable?

4. Is this design iconic and own able? Can the client build brand recognition with this design?

5. Am I pushing the limits of design and manufacturing? If so, is it within my client's capabilities to execute on successfully?

6. How well does this solution play with existing design the client already has and/or other initiatives?

What is good design? And any book recommendations to get better at being a design student?

To me, good design is the wise integration of progress into everyday life. Specifically to product design, good is measured by the elegance and effectiveness in which a problem is solved through design and engineering and the quality of experience for the human who will be experiencing the product or environment.

Beyond that it will take hours to explain exhaustively so I've included a few links that might help.

Less and More: The Design Ethos of Dieter Rams

Super Normal: Sensations of the Ordinary

Dieter Rams: As Little Design as Possible

BREAKING IN: Over 100 Product Designers Reveal How to Build a Portfolio That Will Get You Hired

Skills you need to be a successful designer?

1. Hard skills are table stakes: 3D CAD, sketching, rendering, 3D modeling, sensitivity to form development. This is so a junior designer can be utilized immediately.

2. Have passion. If you are not obsessively passionate about design you can't complete, especially in today's market. Passion will drive the late hours, extra iterations, demand for the better and relentless pursuit of the ideal vision.

3. Understanding and sensitivity to the nuances of design – what solutions are appropriate and, how to wield form, material and color choices with sophistication and taste. It's one thing to be able to communicate your idea with sketches, but you also must be able to communicate its intention in a compelling way.

4. There is talk about IQ and EQ in the workplace – but what about "DQ" (D for design)? It's imperative to have an innate awareness and understanding about what solutions work for a particular problem in the domain of the physical.

What do you think are the essential skills that a product designer should have 6-7 years from now?

In the near future designers will need to expand their toolkit beyond traditional skillsets such as sketching 3D CAD and model making to name a few. Skills such as learning to code and prototype physical/digital interactions will become essential, in addition learning to prototype in VR and AR will become key to evaluating large scale design concepts.

Top 5 Design Traps to Avoid?

1. Do your homework. What is out there? How does your portfolio compare to other top portfolios for designers at your level? Be honest and objective. I also see lot of design concepts for things that already exist. Do a competitive audit, know whats out there, don't work in a silo and feel a ground-breaking pioneer of the greatest invention ever. Relax, the wheel has already been invented and Scott Baio was not better than sliced bread.

2. Slick drawings and renderings do not equal good design. Don't get confused. We want to see solid logic, considered research, and valuable insights and thoughtful storytelling. Let's not forget beauty. Is the form or object beautiful and desirable? Remember, if he's handsome, its romantic, if he's ugly, its stalking. Bottom line, no one cares about a storer the rest of the design details if the product has not seduced with its beauty.

3. Edit. Edit. Edit. Don't show 10 renderings of the same thing from slightly different angles. That shows me your inability to structure / prioritize information. Remember creative writing classes where the teacher asked you to cut your paper to half the number of sheets? Yes, editing is handwork but if results in distilling down to the essence of what you are trying to say.

4. Show process. I don't want to see slick glossies only, i need to understand how you got there so I know it wasn't beginners luck or that your friend in the industry did it for you.

5. What do you think about all the time? Where do your other interests lie? Who are you as a person? What is your point-of-views on design and life? These things inform your design decisions and contributions as a team member.

Final advice, be relentless with your passion and honesty with your work. Be committed to the best solution, not the one you fall in love with. Look outside your discipline. Enjoy your life, there is no such thing as a "design emergency."

_________

You can comb through the full thread here.

Domino Unveils New DXP Delivery Vehicle

$
0
0

Pizza car toppers are designed to fit almost all rooflines, which invariably causes the design to to feel separate and awkward from the car. This is not the case for the Domino’s DXP, the first car specifically designed for pizza delivery. For the Domino’s DXP, CP+B and Domino’s wanted to make a car topper that mated with the Sonic’s roofline. In addition, they wanted to add functionality to the topper that would enhance the delivery experience.

View the full content here

Adidas Departs from Traditional 3D Printed Design with Help From Carbon's Digital Light Synthesis

$
0
0

Late last night, adidas unveiled their game-changing version of digitally fabricated shoes in partnership with tech company, Carbon. The Futurecraft 4D running shoes combine Carbon's Digital Light Synthesis manufacturing process with footwear design knowledge from adidas' Futurecraft team. The result? A sleek sneaker that's way more complicated than it appears:

Carbon's Digital Light Synthesis fabrication method that, "uses digital light projection, oxygen-permeable optics, and programmable liquid resins to generate high-performance, durable polymeric products." During the process, light and oxygen stimulate the resin, activating it and allowing it to form into complex webs. 

A model of what Digital Light Synthesis actually looks like in action (not a working machine, see actual close-up below)

Digital Light synthesis eliminates the need for traditional prototyping or moulding, making it easier to test many different versions of a shoe before going forward with a final design. To put things in perspective, adidas and Carbon have been talking about this project for around one year, but didn't actually start designing the sneaker until around August. Over the past few months, the duo was able to run through around 150 different working prototypes for the Futurecraft 4D. From a design process standpoint, that's insane. In short, Digital Light Synthesis is a much faster process than regular 3D printing.

"For eons the manufacturing process has followed the same four steps that make up the product development cycle – design, prototype, tool, produce. Carbon has changed that; we’ve broken the cycle and are making it possible to go directly from design to production." —Dr. Joseph DeSimone, Carbon Co-Founder and CEO

The Futurecraft 4Ds build upon what adidas learned from last year's 3D Runners, which never actually went to market. Judging by how comfortable the updated version is, I'd say a lot was learned. The major design improvement is, of course, material. My main complaint with the 3D Runners is stiffness—they're difficult to bend because the midsole is so rigid. The Futurecraft 4Ds are much lighter and can twist and bend no problem. The resin midsole is squishy, yet still firm enough to hold your weight and keep you light on your feet. 

Examples of different densities/lattice structures that can be achieved with Digital Light Synthesis—the less dense, the more squishy.

Adidas played with varying lattice density based on an athlete's individual needs with the 3D Runners' midsole, but the Futurecraft 4Ds expand upon this and make the option much more viable (faster production times of as little as one hour per pair and increased prototyping capabilities). The idea that every athlete has different footwear needs will soon be met with personalized midsoles based on individual pressure points. I tested these in the wild on the subway this morning. Even without varying densities, the airy soles moved with my feet and bounced back immediately every time the train jolted—pretty impressive.

Here's a close-up of the from adidas of the process in action.
Look familiar? Futurecraft 4Ds have a very similar sole grip as the 3D Runners!

In a way, the Futurecraft 4Ds combine specific elements we've seen in other recent takes on digitally fabricated sneakers. Digital Light Synthesis is reminiscent of Reebok's Liquid Speeds, except the design emerges from a bath of liquid instead of being drawn by robots. The lattice resin sole is almost like a combination of the sole found on adidas' 3D Runners and Under Armour's 3D ARCHITECHs. The major difference with the Futurecraft 4Ds is the fact that adidas decided to completely ditch 3D printing for an updated additive manufacturing process.

It is exciting to watch so many new digitally fabricated shoes/processes comes into play. Each time a new one is released, it feels like we're getting closer and closer to customizable products. Of course, with any big innovation comes its setbacks (a decrease in production jobs in the future is likely), but I am curious to see how far digital fabrication in footwear will go and how long it will take companies to offer personalized shoes at reasonable prices.

Only 300 pairs of the Futurecraft 4D were released last night, but adidas is hoping to release over 5,000 pairs this Fall/Winter.

Design Experience that Matters: Here's Some Free Files for 3D Printed Tripod Accessories

$
0
0

3D Printed Tripod Quick Release

DIY Quick Release

Why buy one when you can print it yourself? Our goal was to create a fitting so that we could quickly move from tripod shots to close-ups. In a small studio with only one "fancy" camera, we tend to use it for everything. The design features a captive 1/4"-20 nut to attach to the standard tripod bolt. The foot attaches to the camera with a short 1/4"-20 machine screw.

We've shared the STL files and build instructions on Thingiverse.

Replacement Cam Locks for Manfrotto Digi 718B Tripod

After surviving the sandy cliffs of Dogon Country in Mali, the crowds of downtown Dhaka and many rides strapped to the back of a moped in Vietnam, our camera tripod finally broke during a photoshoot at a Boston medical center. Specifically, we broke one of the cam-locks on the tripod legs. In removing the broken latch, we broke another latch on the same leg. Tim has developed a sentimental attachment to this tripod, given that it's almost as old as DtM.

Apprentice camera crewman Abel Edon packs up the tripod after a DtM photoshoot outside Parakou, Benin on a hot afternoon in August 2003

We were about to dive into some tedious CAD work when we discovered that Thingiverse member frubino had already created models of our broken cam lock parts. Hooray Thingiverse!

Our remix adapts frubino's design to our Manfrotto Digi 718B camera tripod. Using Autodesk Inventor's Direct Modify tool, we made the inner walls of the medium and the large latch housings wider all around by 0.5mm for a sliding fit—thanks frubino for posting IGS files!. We also created new thinner pads for inside the cam, which allowed us to fit the cam hinge pin though both the printed part and the original thumb-lock.

The replacement cam-locks

The cam locks files are here.

_____________________________________

This "Design Experience that Matters" series is provided courtesy of Timothy Prestero and the team at Design that Matters (DtM). As a nonprofit, DtM collaborates with leading social entrepreneurs and hundreds of volunteers to design new medical technologies for the poor in developing countries. DtM's Firefly infant phototherapy device is treating thousands of newborns in 21 counties from Afghanistan to Zimbabwe. In 2012, DtM was named the winner of the National Design Award.


A look Inside IKEA's Bizarre Test Lab, Climb Mount Everest in 3D and Did Human or Household Object Wear it Better?

$
0
0

The Core77 team spends time combing through the news so you don't have to. Here's a weekly roundup of our favorite finds from the World Wide Web:

Short on resin? Hollow out your 3D models to save on materials. Here's how.

Considering that this thing evolved into existence, I'm dying to see what didn't make the cut.

The Google Doodles Archive really shows you how the Internet has evolved through the years.

Meet IKEA's Test Lab team. The real question is can I make this the destination of my next vacation?

How to communicate a hard to believe project on Kickstarter.

Stop-motion artist paints with LEGOS.

People generally don't know enough about Canada's most iconic designers (myself included).

Climb Mount Everest in 3D with this interactive video depicting the climb.

Badger spends five days burying a dead cow so he can preserve the meat and take his time eating it.

Hot Tip: Check out more blazin' hot Internet finds on our Twitter page.


Finising the Damascus Steel Chisel, Personalizing Musical Instruments, Reviewing the SafeCut Ruler System & More

$
0
0

Samurai Wood Chisel, Part 2

Wow! UK-based Alec Steele puts in an incredible amount of work finishing up the Damascus Steel Japanese chisel for The Samurai Carpenter, before shipping it across the world to Vancouver. (The unboxing video is at the bottom of this entry.)

Box Dust Collector

Drawing on the research done in the past few videos, Matthias Wandel builds a low-power, quiet dust collector out of what appears to be 100% upcycled materials:

Reassembling a Picture Frame

Not quite a build video, but while reassembling a picture frame from 1948, Frank Howarth makes a hilarious error that I could totally see myself making:

Building a Metal Carport - Part 2

In what's got to be her most labor-intensive project ever, April Wilkerson finishes the steel structure and roofing for the massive carport she's built for her folks:

Quick-to-Make Box Joint Jig

There are lots of different styles of box joint jigs out there, from fancy to simple. Her Steve Ramsey shows you his low-key variant, which can be made in just a few minutes:

Making Four Musical Instruments

David Picciuto combines two of his passions, making things and making music, to partially create his own instruments:

Outdoor Storage Cabinet

Bob Clagett knocks together a simple but sturdy cabinet you can build with a minimum of tools:

Reviewing the SafeCut Ruler System

Ron Paulk explains the merits of FastCap's cleverly-designed SafeCut Rule, which makes it impossible for you to accidentally cut yourself:

Receiving the Samurai Wood Chisel

The Samurai Carpenter unboxes his gift from Alec Steele, geeks out and discusses his plans for the handle:


How to Build a One-Legged Cabinet, a Throwing Star Fidget Spinner, Infuse Golden Veins Into Concrete & More

$
0
0

MakerSpace Cabinet w/ Dovetail & Secret Drawers

Linn from Darbin Orvar builds out a useful storage cabinet with a bunch of flat, wide drawers, then uses up some dead space at the bottom for a secret compartment:

Building Vanity Cabinets

Sandra Powell cranks out the carcase for a custom dual-sink vanity cabinet:

Laura´s Unrideable Beastbike

It's always fun watching Laura Kampf build one of her bicycle experiments, even if this one turns out to be unrideable:

Turning a Failed Project Into a New Technique

When a concrete slab accidentally cracks, Jessie Uyeda uses it as an opportunity to experiment with giving it the kintsugi treatment. ("Kintsugi," literally "golden joinery" in Japanese, is often applied to broken pottery to both recognize and beautify the damage.)

DIY Concrete and Gold Table

Jessie's brother Ben modifies the technique slightly, figuring out a simple, controlled way to induce the "crack:"

Making A Steel Shuriken Fidget Spinner

John Heisz is full of surprises this week. Number one: I didn't think he'd ever make something like a throwing star fidget spinner. Number two: I had no idea what kind of music he'd be into, but I didn't think it'd be this!

Designing and Building A One Legged Cabinet

Chris Salomone embarks on an interesting furniture design experiment, and I give the results a thumbs-up:

Making a Stained Glass Hourglass

From Dustin Penner, this is definitely one of the more unusual materials and resultant object we've seen in the Makers Roundup:


How to Fix Your Dremel

$
0
0

In addition to being a handy and versatile tool, a Dremel is easy to repair due to its relative simplicity of construction. If yours dies or malfunctions, you can bring it back to life with a Torx driver and a little patience. Here are three common Dremel problems and how you can easily fix them:

Won't Turn On/Speed Control Not Working

Thanks to the Hacksmith

Contacts are Clean, Still Won't Turn On

Thanks to Jörgen Börg

Motor Turns On But Shaft Doesn't Spin

Thanks to Noah Vawter

If you need to order parts, or if the problem is beyond you and you want to send yours in for repair, you can contact Dremel's Service Center at 1.800.437.3635. The nice thing about the company is that they not only sell parts inexpensively and offer repair services, but have made repair pricing completely transparent with a downloadable PDF detailing maximum possible charges. If only all manufacturers operated this way!


Weird Bikes Done Right

$
0
0

I'm on record as pretty unimpressed by most of the hubless and minimal frame and clunky carbon fiber and 3d printed and "modular" bike ideas you design nerds come up with, but I still like fun. The designers at Playful Design Studio obviously do too. Their new bike design links two of the more carefree types of bike riding - bmx and fixies—and ropes them together almost literally to do it. 

This roping might be more metaphorical than anything, since the two schools of riding don't automatically play nice, but they did a good job making it literal too. The frame elements directly suggest a tied-together construction, which looks both fun and disconcerting with the fat flatland/cruiser style of the other parts. 

nice brake :/

The weird minimalism also reminds of the various rope or cable tensioned frames we've seen throughout the years. Thankfully this one doesn't just rely on the buzzy appeal of "tensegrity" to keep you moving forward. And they've even added a flat city bike rack to rope down your pizza and beer. 

The crazy high bottom bracket and weirdly aggressive seat choice are design quibbles for "actual riders" and hey, maybe they do a lot of stunts in between their commuter racing. 

Playful Design Studio had their, well, playful designs on view at last week's Lambrate show in Milan. 

A Wireless Charging Platform Compatible with Almost Any Device

$
0
0

The VÜ BLADE wireless charger is a 2-in-1 wireless charging pad that let's you choose to use it as a flat pad or as an upright stand. The adjustable coil slides up to avoid dead spots for convenient charging of any device. Featuring Qi's 15 Watt power deliver, the VÜ BLADE charges up to 3x faster than standard wireless charging and easily fits within your lifestyle at the office or on vacation.

View the full content here
Viewing all 19151 articles
Browse latest View live


Latest Images